

USDE Trading
Live Markets Guide
This guide walks you through your first trade on the Nunchi Yield Exchange (YEX) using USDE as collateral, from opening a live market page to seeing your order appear in Open Orders.
Unlike the Strategy Sandbox (sandbox collateral), USDE trading is live: real capital, real fills, real risk controls. The interface is the same unified terminal: chart, order book, and an active order ticket.
Quickstart
You’ll complete these steps in order:
Open a YEX Live market that supports USDE collateral
Connect your wallet and check eligibility
Deposit USDE (fund your trading account)
Establish Connection (Fast Trading)
Configure a Limit (or Market) order
Approve Builder Fee (one-time)
Submit the order and verify it in Open Orders
Live funds warning: USDE trading uses real collateral. Use conservative size and leverage until you’re comfortable with execution and liquidation behavior.
1. Open a YEX Live market (USDE)
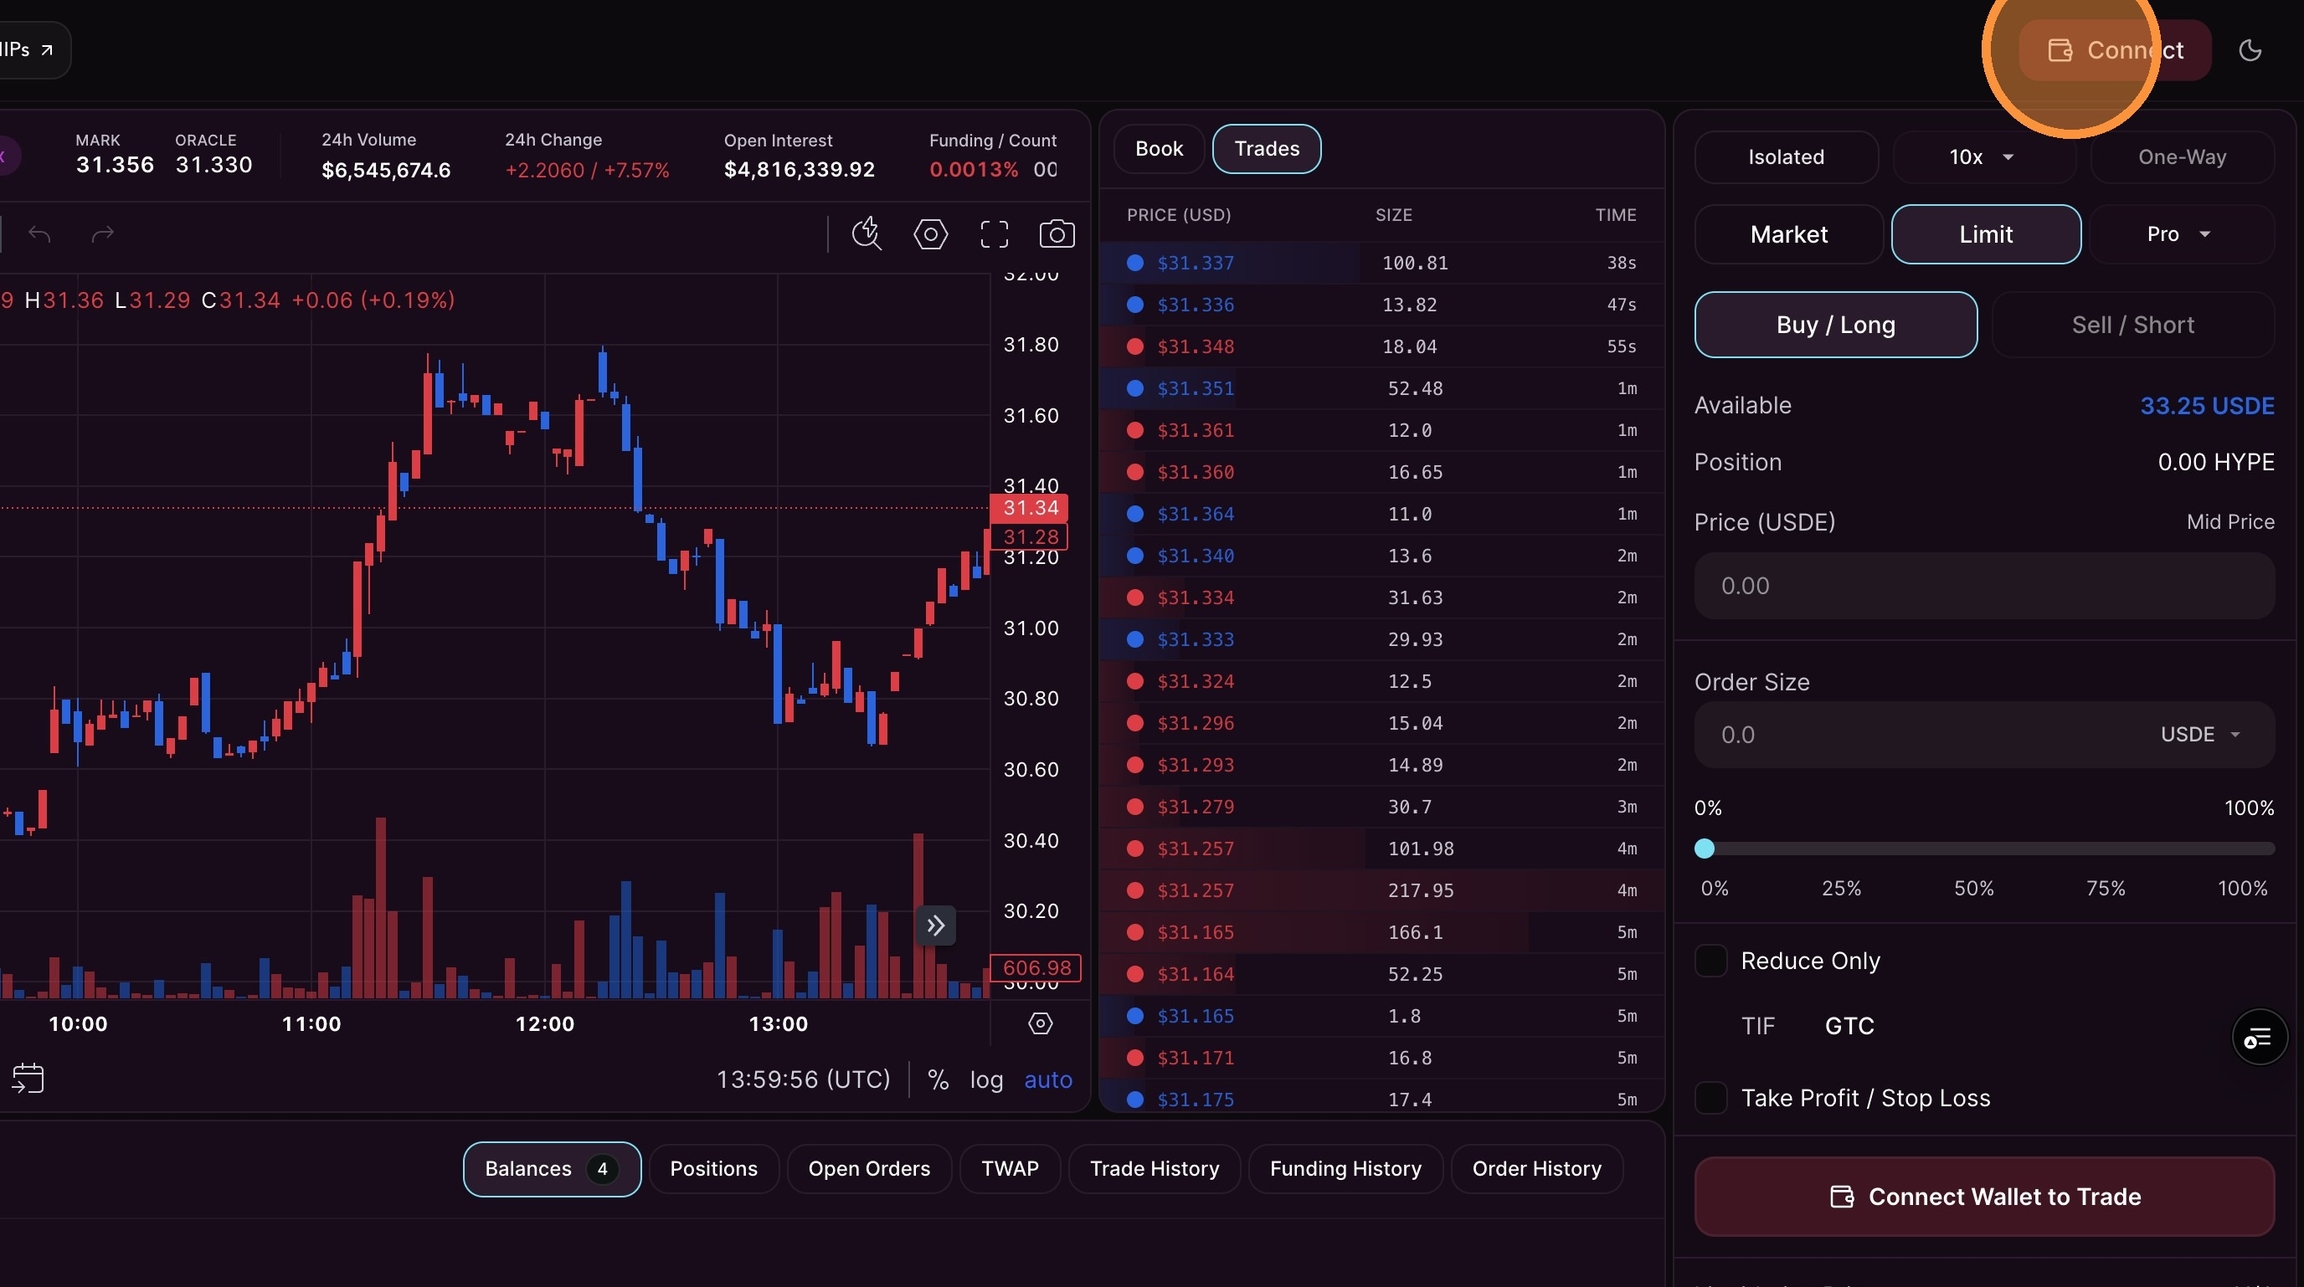
When you land on a YEX Live market, the full trading interface is visible, but trading is disabled until you connect and fund an account.
You will typically see:
Market header: MARK, ORACLE, 24h Volume, Open Interest, and Funding / Countdown
Price chart (timeframes + indicators)
Order book (Book / Trades)
Order ticket on the right (disabled)
Portfolio tray at the bottom prompting you to connect / deposit
Tip: If you don’t see USDE as an available collateral option, you may be on a demo market or a market configured for a different margin asset.
2. Log in and connect your wallet
Click Connect (top right) or Connect Wallet to Check Eligibility.
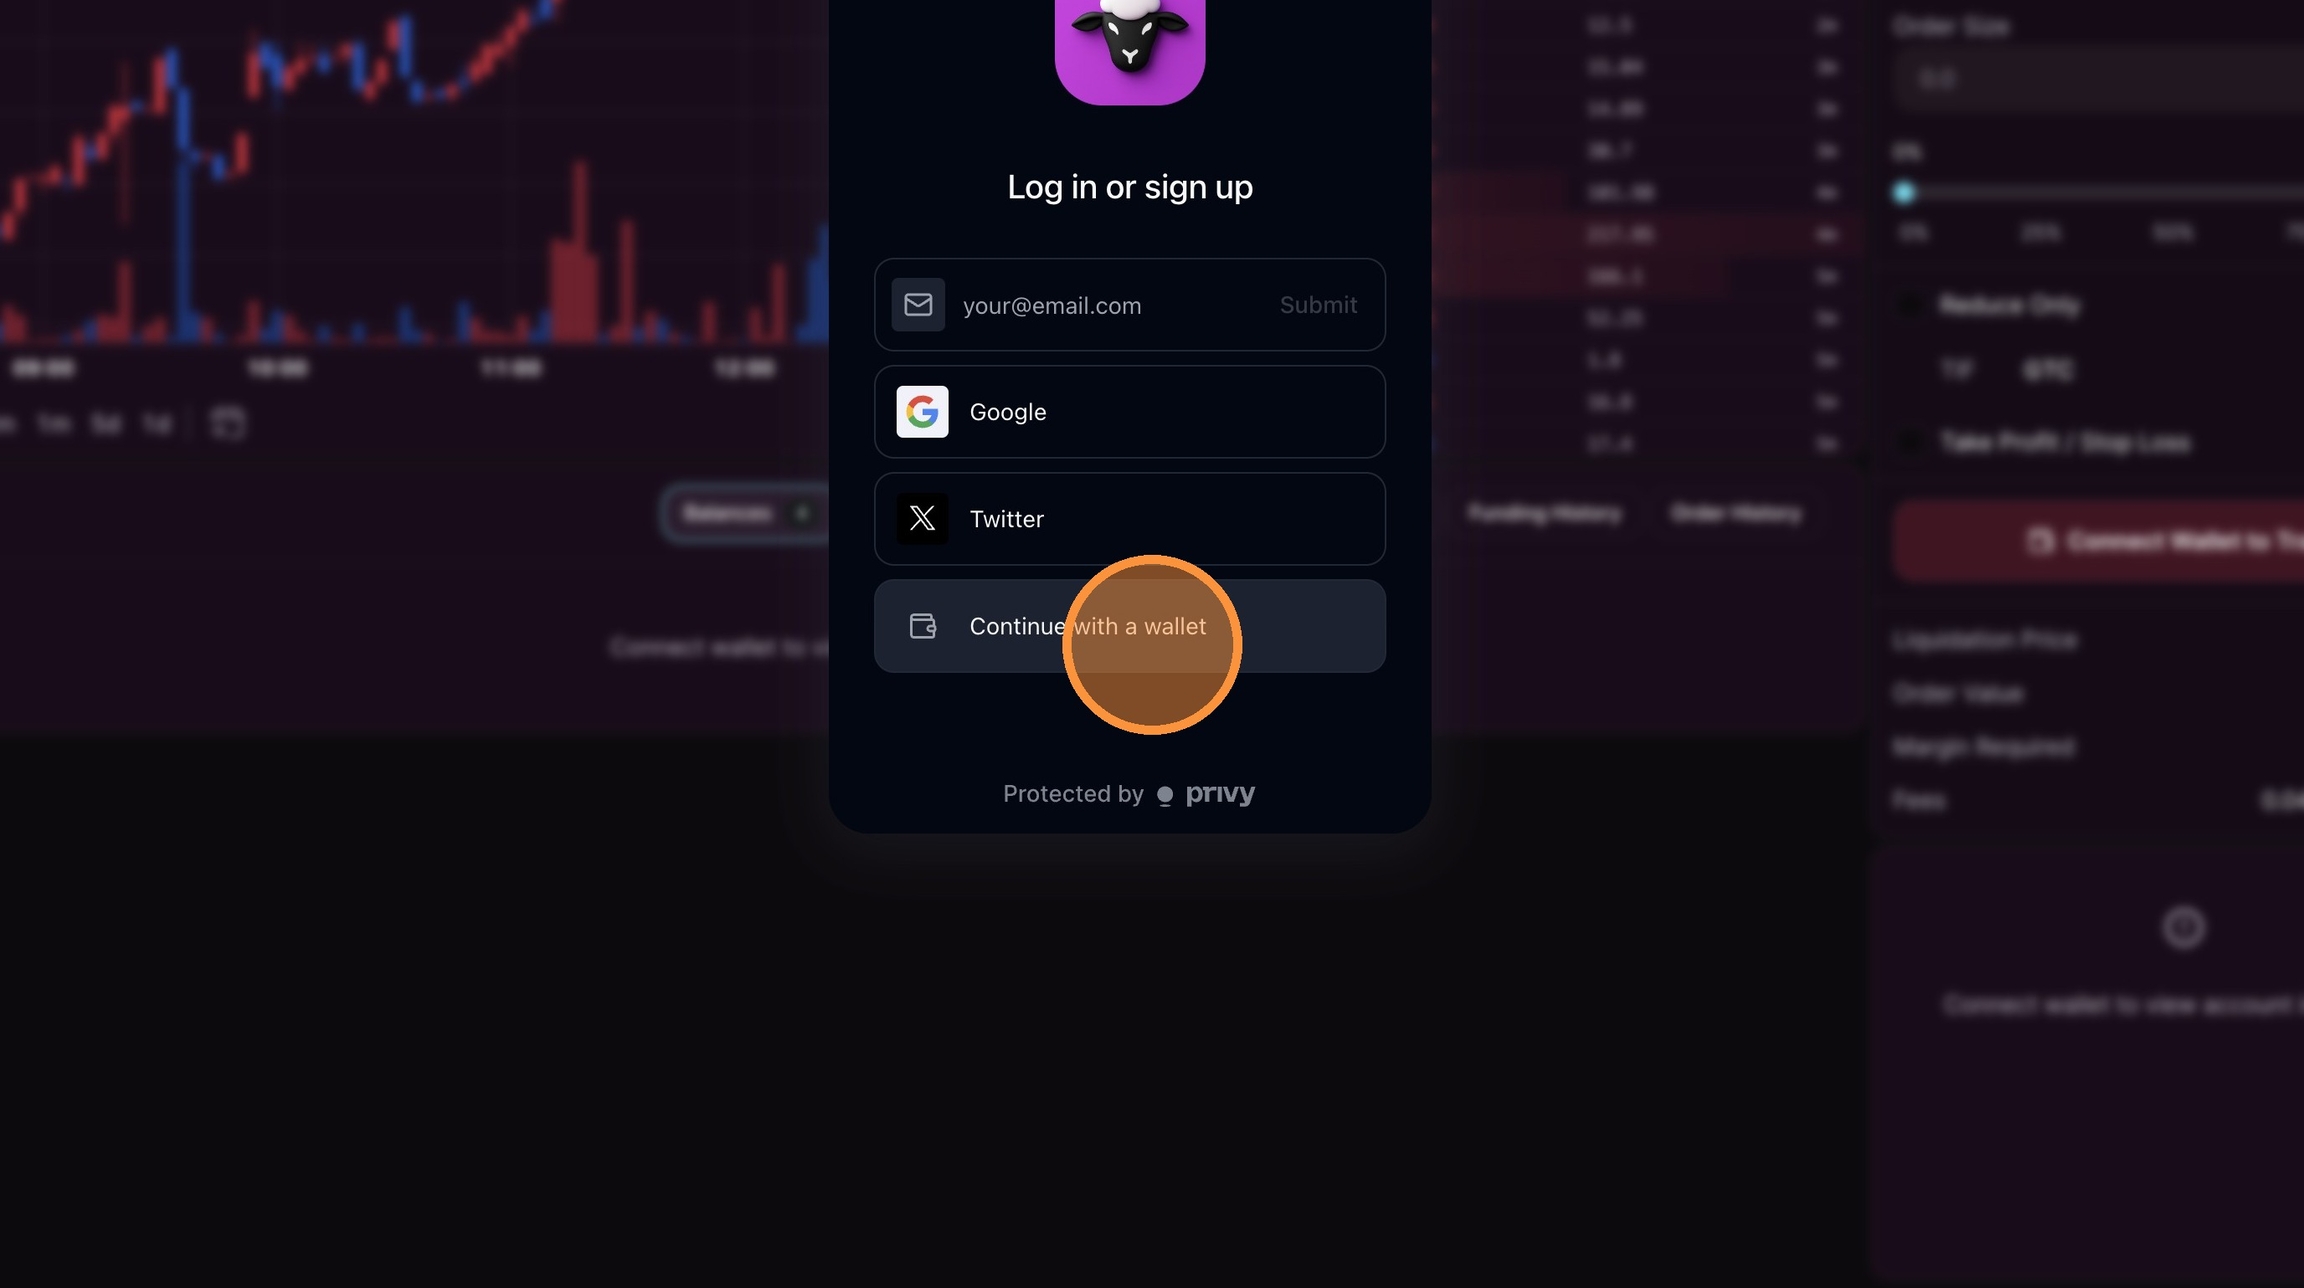
You’ll be prompted to log in through a secure authentication flow. Common options include:
Email
Continue with a wallet (recommended for trading)
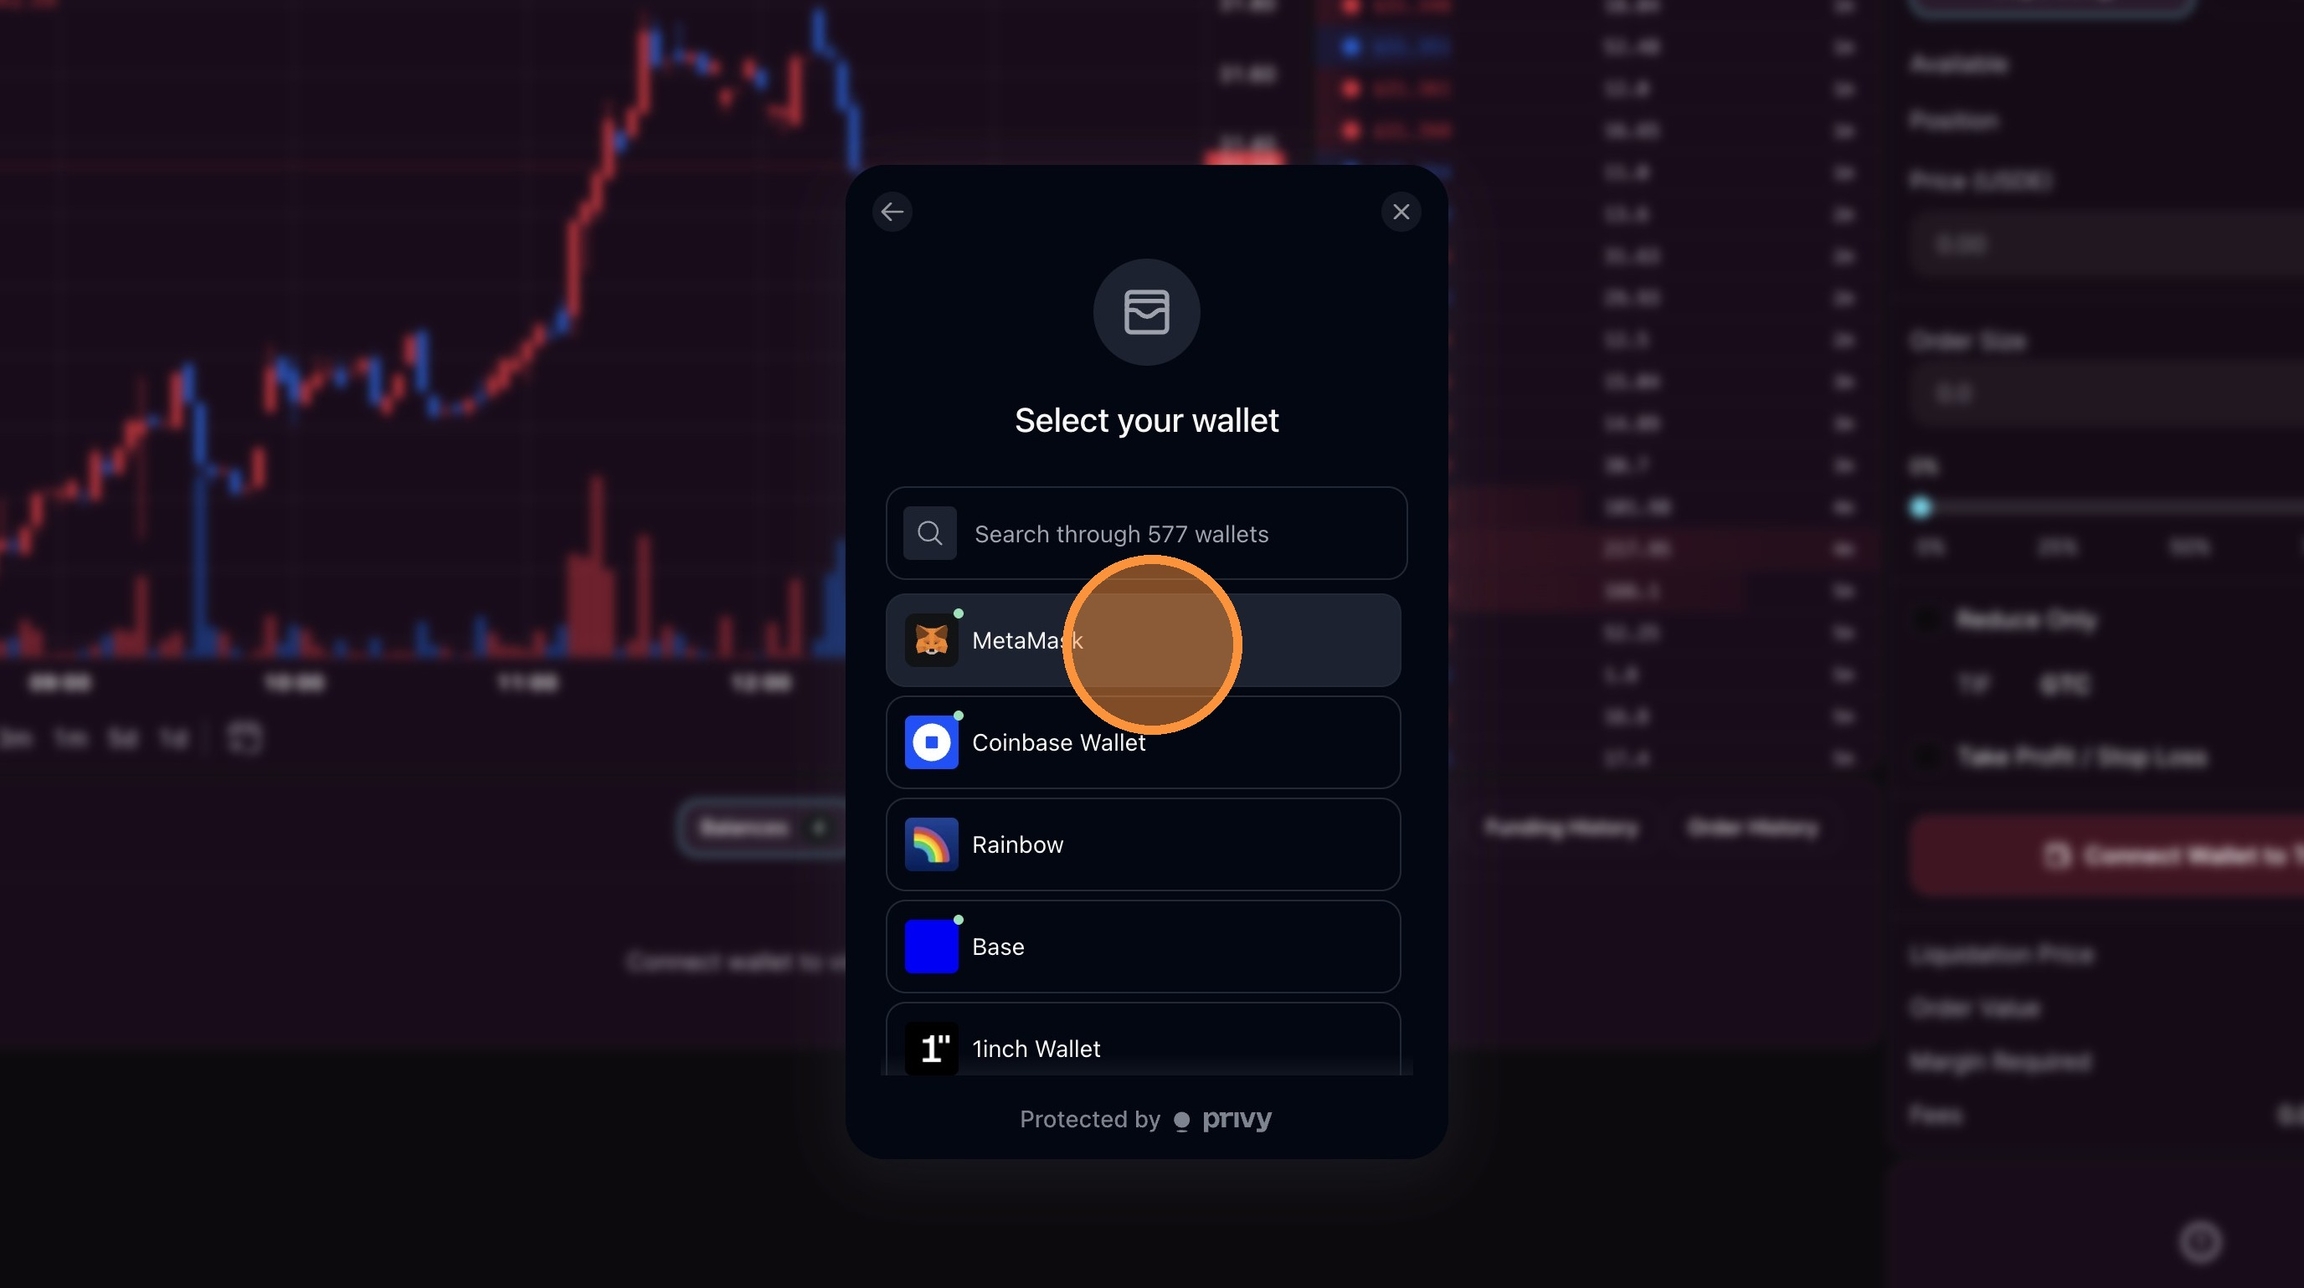
Choose Continue with a wallet, then select your wallet (e.g., MetaMask).
Live access and eligibility
Live markets may open with an access modal explaining the product is in beta and access is limited.
If you see a Market Access Threshold message, connect your wallet to check eligibility.
Tip: If you’re not eligible yet, you can still explore the UI, but trading actions will remain gated.
Approve the wallet connection
Approve the connection request in your wallet.
Once connected, you’re authenticated, but trading will still be disabled until you’ve funded your account with USDE.
3. Deposit USDE (fund your account)
In the order ticket (or Portfolio tray), you’ll see:
Available shows
0.00 USDE(or equivalent)a Deposit button (or “Add Funds”)
Click Deposit USDE to fund your trading account.
Before depositing, make sure you have:
USDE in your wallet (or a path to acquire it)
enough gas for the deposit transaction on the selected network
Note: Depending on the environment, the UI may guide you through bridging or swapping into USDE. Follow the on-screen prompts for the cleanest path.
Confirm your portfolio and account panels populate
After depositing USDE, several UI panels update:
Portfolio → Balances shows USDE:
Total balance
Available balance
USD value
Top-right header shows your account value
The Account panel appears on the right with:
Account Equity
Spot balance
Perps overview
At this stage, the order ticket typically shows Establish Connection.
4. Establish Connection
Click Establish Connection to enable fast, signature‑free trading.
The modal explains:
Fast Trading: place orders without signing every action
Secure Storage: a key is stored locally in your browser
Account Abstraction: enables seamless order execution
Click Connect to proceed.
Fast Trading improves UX, but changes how you authenticate orders.
Use Fast Trading only on devices you trust.
Avoid shared/public computers.
If you clear browser storage or switch browsers, you may need to re‑establish the connection.
5. Configure your first Limit order
Once Fast Trading is enabled, the order ticket becomes fully active.
A common first trade setup:
Margin Mode: Isolated
Leverage: 3× (start low)
Order Type: Limit
Side: Buy/Long or Sell/Short
Price: set your limit price
Order Size: set your size
Optional: Take Profit / Stop Loss (recommended)
As you configure the order, the preview panel should show:
Liquidation price
Order value
Margin required
Fees
Tip: Treat the preview like a pre‑flight checklist. If liquidation is too close, reduce leverage or size.
6. Approve Builder Fee (one-time)
Before your first trade, YEX may require a one-time Builder Fee approval.

What happens:
Click Approve Builder Fee
Your wallet prompts you to approve
No trade is placed yet — this is authorization only
After approval, the main action button updates (Long Limit, Short Limit, etc.).
7. Submit the order
Click the main action button to submit the order (for example, Long Limit or Short Limit).
Confirmation behavior:
A success notification appears (often lower-right)
The order ticket resets
Your order is now live on the platform
View and manage your order in Open Orders
Navigate to Portfolio → Open Orders.
You should see:
Your primary order (entry)
Your Stop Loss (Reduce Only — closes if price moves against you)
Your Take Profit (Reduce Only — closes if price moves in your favor)
Key controls:
Cancel — cancel an individual order
Cancel All — remove all open orders
View — inspect order details
What happens next
From here:
When the limit order fills, the position appears in Positions
When TP or SL triggers, the position closes automatically
You can manually exit using Reduce Only + Market
Troubleshooting
Trading is still disabled
Ensure you’ve connected your wallet
Ensure you’ve deposited USDE
Ensure you’ve clicked Establish Connection
Ensure the Builder Fee is approved (first trade only)
If access is gated, confirm eligibility status in the access modal
I submitted an order but don’t see it
Check Portfolio → Open Orders
Confirm you’re on the correct market (the one supporting USDE collateral)
Refresh after a few seconds
My TP/SL didn’t attach
Make sure TP/SL is enabled before submitting the order
Verify TP/SL appears as separate lines in Open Orders
Live trading is for execution
USDE collateral is real. Use live markets to practice:
disciplined sizing and leverage
working limit orders vs market orders
attaching TP/SL consistently
reading the order book and execution behavior
If you want to test the workflow without risk, use the Strategy Sandbox with demo collateral first—then toggle into live with the same interface.
Last updated
Was this helpful?